DIY Grommet Top Curtain Panels
My new house has 10' ceilings. When we moved in, none of my curtains were long enough. We wanted to have curtains in all of the rooms for privacy. Our old house was very dark and I did not wants white mini blinds on the first floor. I wanted as much natural light to come in as possible!
We put Ikea curtains in all of the windows on the first floor. They were fairly inexpensive and did the trick. I have a habit of being too neutral and I am getting a bit too beige on beige. Since we can't paint yet, I wanted to bring in a little color. Curtains ARE EXPENSIVE! I also like grommet top because they can easily be opened and closed. My husband likes to close them and I come behind them and open them.
I decided on these Farrah Fretwork Panels in blue from Target in 54"x95". They were $29.99 a panel. That was a lot more than the $9.99 a panel Ikea curtains. They are more of a smokey blue color with a hint of green. But, they only came in a rod pocket. I decided to experiment with adding grommets.
Here are the tops of the curtains with grommets.
Here is a stock photo from Target of the Farrah Fretwork Panels (rod pocket)
Materials Needed
Curtain Panels
Dritz Grommets
Tape Measure
Metal L or T square or Meter Stick
Scissors
Pencil
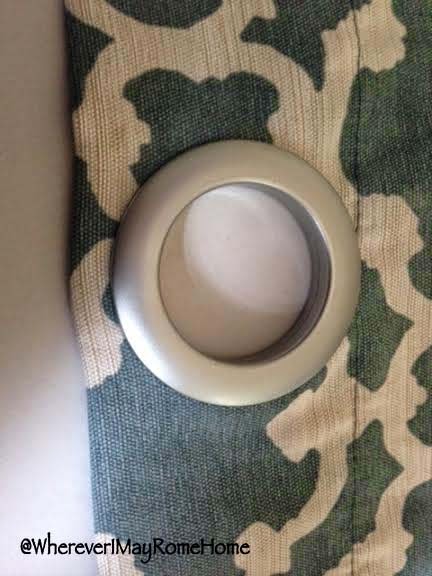
I purchased 4 sets of Dritz Grommets from Walmart. They did not have them in the store, I had them delivered site to store. I purchased the brushed silver. They have several different finishes. They are made of plastic. The brushed silver is not "metalesque" at all but from a distance you hardly notice.
Please make sure you measure your curtains first. Out of the four panels I purchased, only one of them was actually 54 inches wide. There are 8 grommets, so measure accordingly.
Then, mark your curtain panels with a pencil. I used a pencil just in case I made any errors. After I marked the measurements for the sections, I marked where the holes should be and used the provided template to mark the holes.
After I measured and marked all the holes and ensured they were the proper distance apart, I sat and stared at my $29.99 curtain panel for about 15 minutes. I won't lie, I felt a bit anxious to cut holes in brand new curtain panels.
I texted my husband. I'm not sure how that would have helped. I finally cut a small slit in the fabric and it was now done..... I had just cut a hole in brand new $29.99 panels.
I aligned the hardware and pushed the two pieces together. You have to be careful to cut on the template exactly. If you cut too little (which I did at first) the hardware won't grip correctly and you can not snap the pieces together. If you cut too much you run the risk of being able to see your hole around the hardware.
Here is what the grommets look like snapped together.
Here is a shot of what the finish looks like against polished silver and brushed nickel. You can see that it really is silver "colored" not metal.
Here is what they look like. I put them in both my Living Room and Dining Room since the two rooms are connected.
All of my first floor curtain rods and hardware are from Ikea. The rods are RACKA and the brackets are BETYDLIG. They're cheap and I could get them all to match.
One of the things I found super about these is the ability to adjust them higher or lower. This came in handy when I replaced the Ikea curtains for the Target Farrah curtains because adding the Grommets shortened the curtains slightly. Since the plate seen below covers the bracket where they are fastened to the wall, you can't see it unlike traditional brackets.
Here is the top of the curtains with the Grommets


Comments
Post a Comment